rainbow rice {st.patrick's day style}

rice-header.jpg

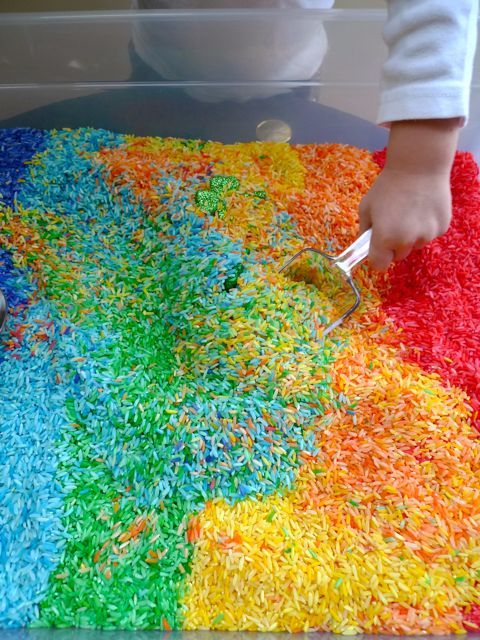
Rainbow rice. An amazing sensory play project that I have been waiting to do with the little miss. I first saw it when I was pulling together ideas for her rainbow sprinkles birthday party. I wanted to wait and introduce it at a later time. I figured St. Patrick's day was a great time to learn about rainbows and leprechauns! And with the gray weather we've been having, I need to see rainbows now more than ever!

Originally, I imagined this as a super fun St. Patrick's Day party activity. Then I had a vision of two overly excited two-and-a-half-year-olds flailing rice all over my house and well, I chickened out!! I still made two boxes of rainbow rice, but the girls could enjoy them on their own. (I can hear my own mother laughing out loud right now.)

I started with a 25lb bag of rice. This was exactly enough for 8 cups of each color of the rainbow. Coloring the rice is very easy and I was surprised at just how fast it went.

rice1.jpg

I put the 8 cups of rice in a gallon size ziplock bag. Next, 1-2tbsp of alcohol, which helps set the color, and as many liquid food coloring drops as needed to achieve the color desired. I started with 25-30 and increased it from there. Seal the bag and toss the rice in the bag until the color is distributed. Easy as that. Empty the bag onto a cookie tray to dry.  The smell of the alcohol will go away as the rice dries.

Now to fill the boxes! I wanted something big enough for enjoyable play with funnels, buckets, etc., but not too big, I decided on 28 quart clear boxes with lids for easy storage. They measure 23" x 16 1/4" x 6". It worked out PERFECTLY for the 28 cups of rice I put in it (4 cups for each of the 7 colors of the rainbow). Enough rice to play with and have fun, but not too much to overflow into the house. Totally ideal for toddler size!

rice4.jpg

As I put each color in, I would push it towards the last color to make each color about 4" in width. Doesn't it make you smile?

rice6.jpg

To introduce Clementine to the fun of St. Patrick's Day: leprechauns, rainbows, shamrocks, and a pot of gold, I bought some golden coins and glittery shamrocks to hide in the rice.

rice7.jpg

I hid 6 shamrocks and 12 coins in each box.

rice8.jpg

I simply pushed them into the rice. Buried treasure in the rainbow! I told her all about leprechauns and I read her a little Irish poem that I had found. We talked about how tall they were, what color they liked to wear, and about their mischievous ways. And of course how they say they like to hide their treasure at the end of the rainbow! Next came the colors of the rainbow (I went with the classic ROYGBIV, she'll have to learn it eventually, right?!) As much as she thought all of this was so cool, all she really wanted to do was get her little hands into that box of rice!

rice10.jpg
rice-colors-mixing.jpg
rice-coin.jpg

She was very excited to find the coins and shamrocks. When they were all found she played for a VERY long time. Yes! I love a successful project. Will I be finding rice all over my house forever? Probably. But, I think it's worth it.

This is what the box looks like now...

rice-rainbow.jpg

hearts and crafts: the very pink valentine celebration

vday-table-left2.jpg
vday-heart-cookies.jpg
vday-tableright.jpg
vday-necklace-supply.jpg
vday-lovebite3.jpg
vday-dress.jpg
vday-table-left-with-eggs.jpg
vday-puttingvalentinesin-frog.jpg
vday-hopping-like-frog.jpg
vday-pond.jpg
vdaycccc.jpg
vday-readingvalentines.jpg
vday-weez.jpg
vday-monket.jpg
vday-adshomemadev.jpg
vday-makingnecklce.jpg
vday.jpg
vday-.jpg

The little miss had her best friend, Addie, over for a pink valentine celebration. Pink cupcakes, candy, hearts, cookies, valentines, balloons, tissue paper flowers, even hard boiled eggs! There's a small part of me that hopes if I just bombard her with pink she will decide to rebel and like another color; until then, I put on my very pink, vintage, bedazzled dress and a big smile.

The valentines were placed in the froggy 'mailbox' that I had made out of a box, some green wrapping paper, and some extra large google eyes. Before the girls could open them, they had to hop like frogs on the hearts, jump or swim across the pond of bubble wrap (who can't resist popping those bubbles?!) and slither like a caterpillar or snake under the streamers. It was lots of fun. They did it quite a few times before opening their home made valentines and then about thirty more times after! They managed to squeeze in a few bites of their heart shaped pb&j's, munch on a few cookies, and lick the pink frosting off of a cupcake or two.

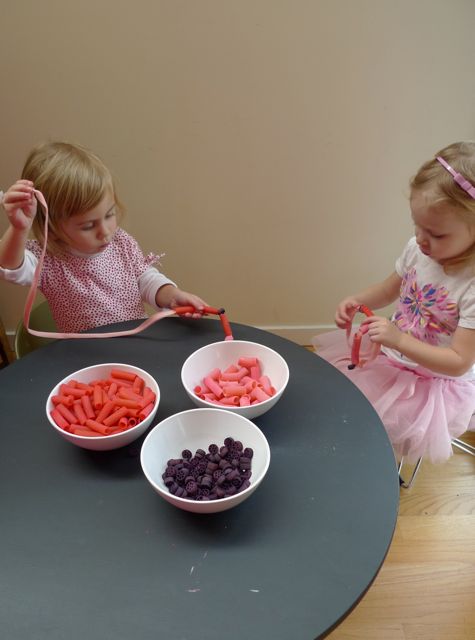
Then it was craft time. Pink pasta necklaces with a paper "locket" that I had written 'best friends' on. This was a big hit! After stringing the pasta, the girls pasted their pictures inside the heart. They loved it! Look how happy they are as they checked out their necklaces in the mirror. I love that pure joy!

Even weezie, our brussels griffon, had fun at the pink party. Although, I'm sure she's quite happy to have the bubble wrap pond off the floor today. Me too!

Details on the pasta necklaces and 'love bite' cookies to follow...

homemade pizza

pizza.jpg

We are back in Portland.

It's dismal, gray, cold, rainy, windy, icy, sometimes snowy, and all I can say is yuck. I don't want to leave the house.

There is a lot to get organized after the holidays and throw in being gone for almost four weeks and well, I have a lot to do. I was SO very excited when our Clementine-sitter (baby sitter seems like the wrong thing to say, and actually there is no 'sit' involved which is why I was so happy to see her!) arrived at the door. It was even more delightful that she came bearing belated presents of the home made variety. My favorite! Look at these two slices of pizza she crocheted for the little miss! Love them!

donut hole snowman

s9.jpg

Hello, little snowman! I was inspired by Martha Stewart's ice cream and coconut snowman. What a cute idea, but just not the right party treat for our toddler craft party. Hmm, what else is round and little?

Donut holes!

At first, I imagined plain donut holes that I would frost, stick together, and top off with a toasted marshmallow hat like Martha. Funny thing is, I couldn't find plain donut holes. After I thought about it some more, I realized that frosting on top of donuts was not really necessary (especially for two year olds!) so why not just powdered sugar covered ones? That just made the whole project SO much simpler!

What you need:

3 powdered sugar covered donut holes

toothpick

frosting

2 eyes (nonpareils, or 2 pieces cut from black licorice string, or anything else you can think of that will work, even two tiny dollops of black frosting)

carrot nose (I used a piece of candy corn, cut the orange middle and molded it into a carrot. You could also use marzipan and dye it orange.)

mouth (In this case, red decorating gel you can buy in the little tube in the baking section did the job!)

One skinny pretzel stick cut in half for arms.

whipped cream for snow (optional)

Here's the step-by-step:

s2.jpg

Put a dollop of frosting on your plate. Place one donut hole in the frosting. Insert toothpick into the center of the donut, pointy side up. Do not push all the way down.

s3.jpg

Add the second donut hole.

s4.jpg

Add the third donut hole.

s6.jpg

Use another toothpick to make indentations for your eyes, nose, and arms. Put a tiny amount of frosting in the holes to help hold everything in.

s7.jpg

Insert eyes, nose, and arms.

s8.jpg

Add a mouth.

s9.jpg

Some whipped cream snow and a few sprinkles make a little more fun!

s10.jpg

These little snowmen go together in minutes! Sure, you could add a hat and a scarf if you wanted, but I like them simple and sweet. I can't help but smile when I see them. The girls LOVED them!

happy meal

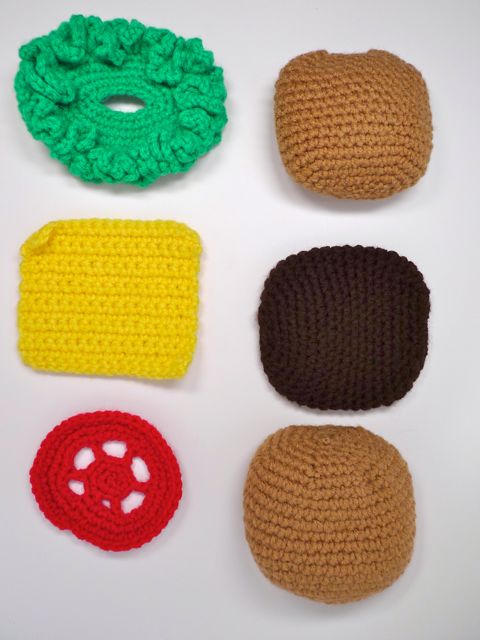
This amazing crocheted treat was made by Kate Darnall in Portland. It definitely puts a new spin on fast food. Seems so much healthier when it's hand crafted of yarn.

She donated it to the art benefit in honor of our friend, Kevin. Clementine's eyes lit up when she saw it on display.

Now, it's ours for the little miss to serve up in her kitchen,

a mom approved happy meal!

For those nifty crocheters out there, ahem, mom, yes, you're one of them, here is a page of free food patterns from the wonderful world of crafty bloggers.


one storage box + cute fabric= extra counter for the educo kitchen!

c1.jpg
c2.jpg
c4.jpg

The little miss loves her educo kitchen set. For her birthday she received a few additions: a mixer to whip up some cupcakes like her mama, and a toaster to make some breakfast for her dad. The trouble is, there just isn't enough counter space.

The solution?

One tall white storage box, a mini spring rod, and some cute fabric for a curtain.

Presto!

The kitchen renovation is complete in under and hour!