mummy meatballs

mb8.jpg

A couple of years ago I made mummy meatloaf.  It's so fun, but so much food for two and a half of us. The solution? Mummy Meatballs!

(And if you're into gore, you could even say they are floating in blood! Ew!)

I have to admit I'm kind of overly pleased with myself right now. These were perfect! They are relatively easy to make and I actually like the idea of my pasta and meatball wrapped up in one little package.

Here's what I did:

Make meatballs.

mb3.jpg

While they are cooking make fettucini. It is very important that you do not overcook it. Al dente! Drain the pasta and arrange on a cookie sheet.  This makes it easier to work with.

mb1.jpg

I used pre-sliced and packaged mozzarella, cut it, and wrapped it around my meatball.

mb2.jpg

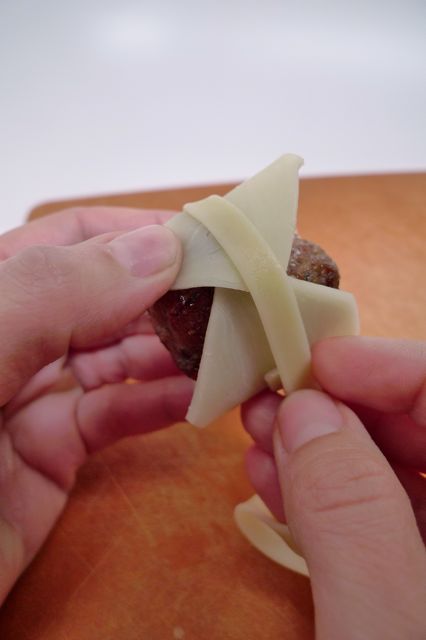
I wrapped one piece of the pasta around the meatball which then held the cheese in place.

mb4.jpg

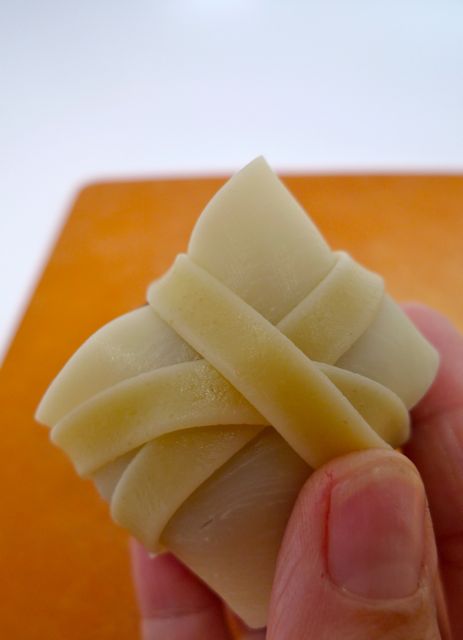
Keep wrapping pasta around the meatball to form your little mummy.

mb5.jpg

Place on a baking sheet.

mb6.jpg

I put the tray in our toaster/convection oven at 400 degrees to melt the cheese.

Next, I used a toothpick to make indentations where the eyes would go. I placed peppercorns in the holes and the melted cheese held them in place. You could also use little capers.  Serve in a bowl of red sauce.

mb9.jpg

Why hello, little mummy.

mb7.jpg

Happy Halloween!

monster cupcakes

monster6.jpg

I came across a package of children's vampire teeth and a light bulb went off in my head:

Monster cupcakes!

They were purple and green and perfect.

Once I remembered that Wilton makes candy eyes my whole vision came together very quickly:

chocolate cupcakes

(Oh my! A new favorite recipe from the farm chicks blog. This will surely be my go to chocolate cupcake recipe; so moist! Next time I will add mini chocolate chips for a little more chocolate lovin'.)

+

Fluffy white icing (that I tried to make orange)

+

colored sugar

=

Halloween FUN!

monster5.jpg
monster1.jpg
monster4.jpg
monster2.jpg
monster3.jpg

It was super fun to make these. The frosting is so light you can really pile it on your cupcake and then it just holds it's shape! Stick the teeth in (cut them in half to make a closed mouth or even just use one), add eyes, one or three or more, and sprinkle with sugar. Perfection is definitely not what you're going for; with these monsters the crazier the better!

Fluffy White icing recipe from The Modern Baker by Nick Malgieri

4 large egg whites

Large pinch of salt

1 Cup granulated sugar

1/2 cup of light corn syrup

Fill half a saucepan with water and bring to a boil over medium heat. Combine egg whites, salt, sugar, and corn syrup in the bowl of an electric mixer and whisk by hand, just to mix together. Regulate the heat under the pan of water so that it boils gently and place the bowl on the pan. Whisk gently just to keep the mixture moving until it is hot (130 degrees F/55degrees C) and all of the sugar is dissolved. Place the bowl on the mixer with the whisk and whip the icing until it has cooled and become white and fluffy.

photo1-300x300.jpg

colored cupcakes baked in baby food jars!

a.jpg

A while back I saw rainbow cake baked in a mason jar and fell in love.

At that moment I knew for my sister's baby shower I would attempt to bake cake in baby food jars. How appropriate!

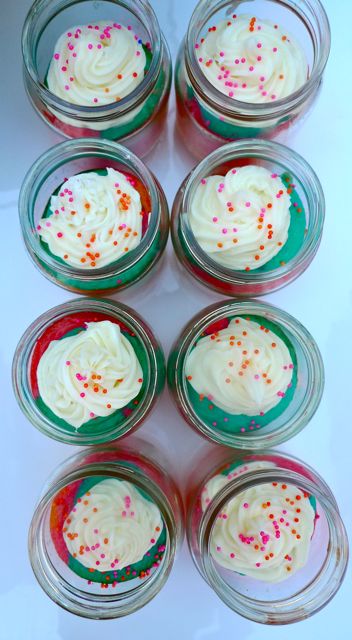
Bright Pink, orange, and blue are her colors and with the help of the new neon food coloring on the market (gasp! sorry all-natural food coloring, you just didn't work for this party!) I was able to achieve just that. It was actually quite easy. Spray the jars with a non-stick baking spray and fill with batter. I layered my colors but didn't pay too much attention to being perfect. I wasn't looking for stripes just colorful fun cake. It's important to fill the jars just shy of the halfway mark to ensure that it doesn't rise up and leak over the sides while baking. That wouldn't be so pretty. I used 4oz jars which is the perfect snack size equivalent to a cupcake. After filling the jars, place on a cookie sheet, or in a cupcake pan, and bake. After they have cooled completely top with a dollop of frosting.

shower5.jpg
shower6.jpg

I like that the whole sweet treat is contained in the jar. You could even put the lid on, cover it with a coordinating piece of fabric, tie a ribbon around it and use it as a cute baby shower favor!

Ours were placed on the dessert table next to a pile of bright orange spoons (you need a spoon to eat the cake out of the jar) to enjoy while watching the big present-opening-event.

jar3.jpg
jar4.jpeg

The best coconut cake

and quite possibly the best cake I have ever made. At least that's what the mister said.

Before leaving for work yesterday he said not to worry and slave over a cake.

Just do something easy.

About thirty minutes later I received an email containing the recipe for the Halekulani Coconut Cake.

Oh boy.
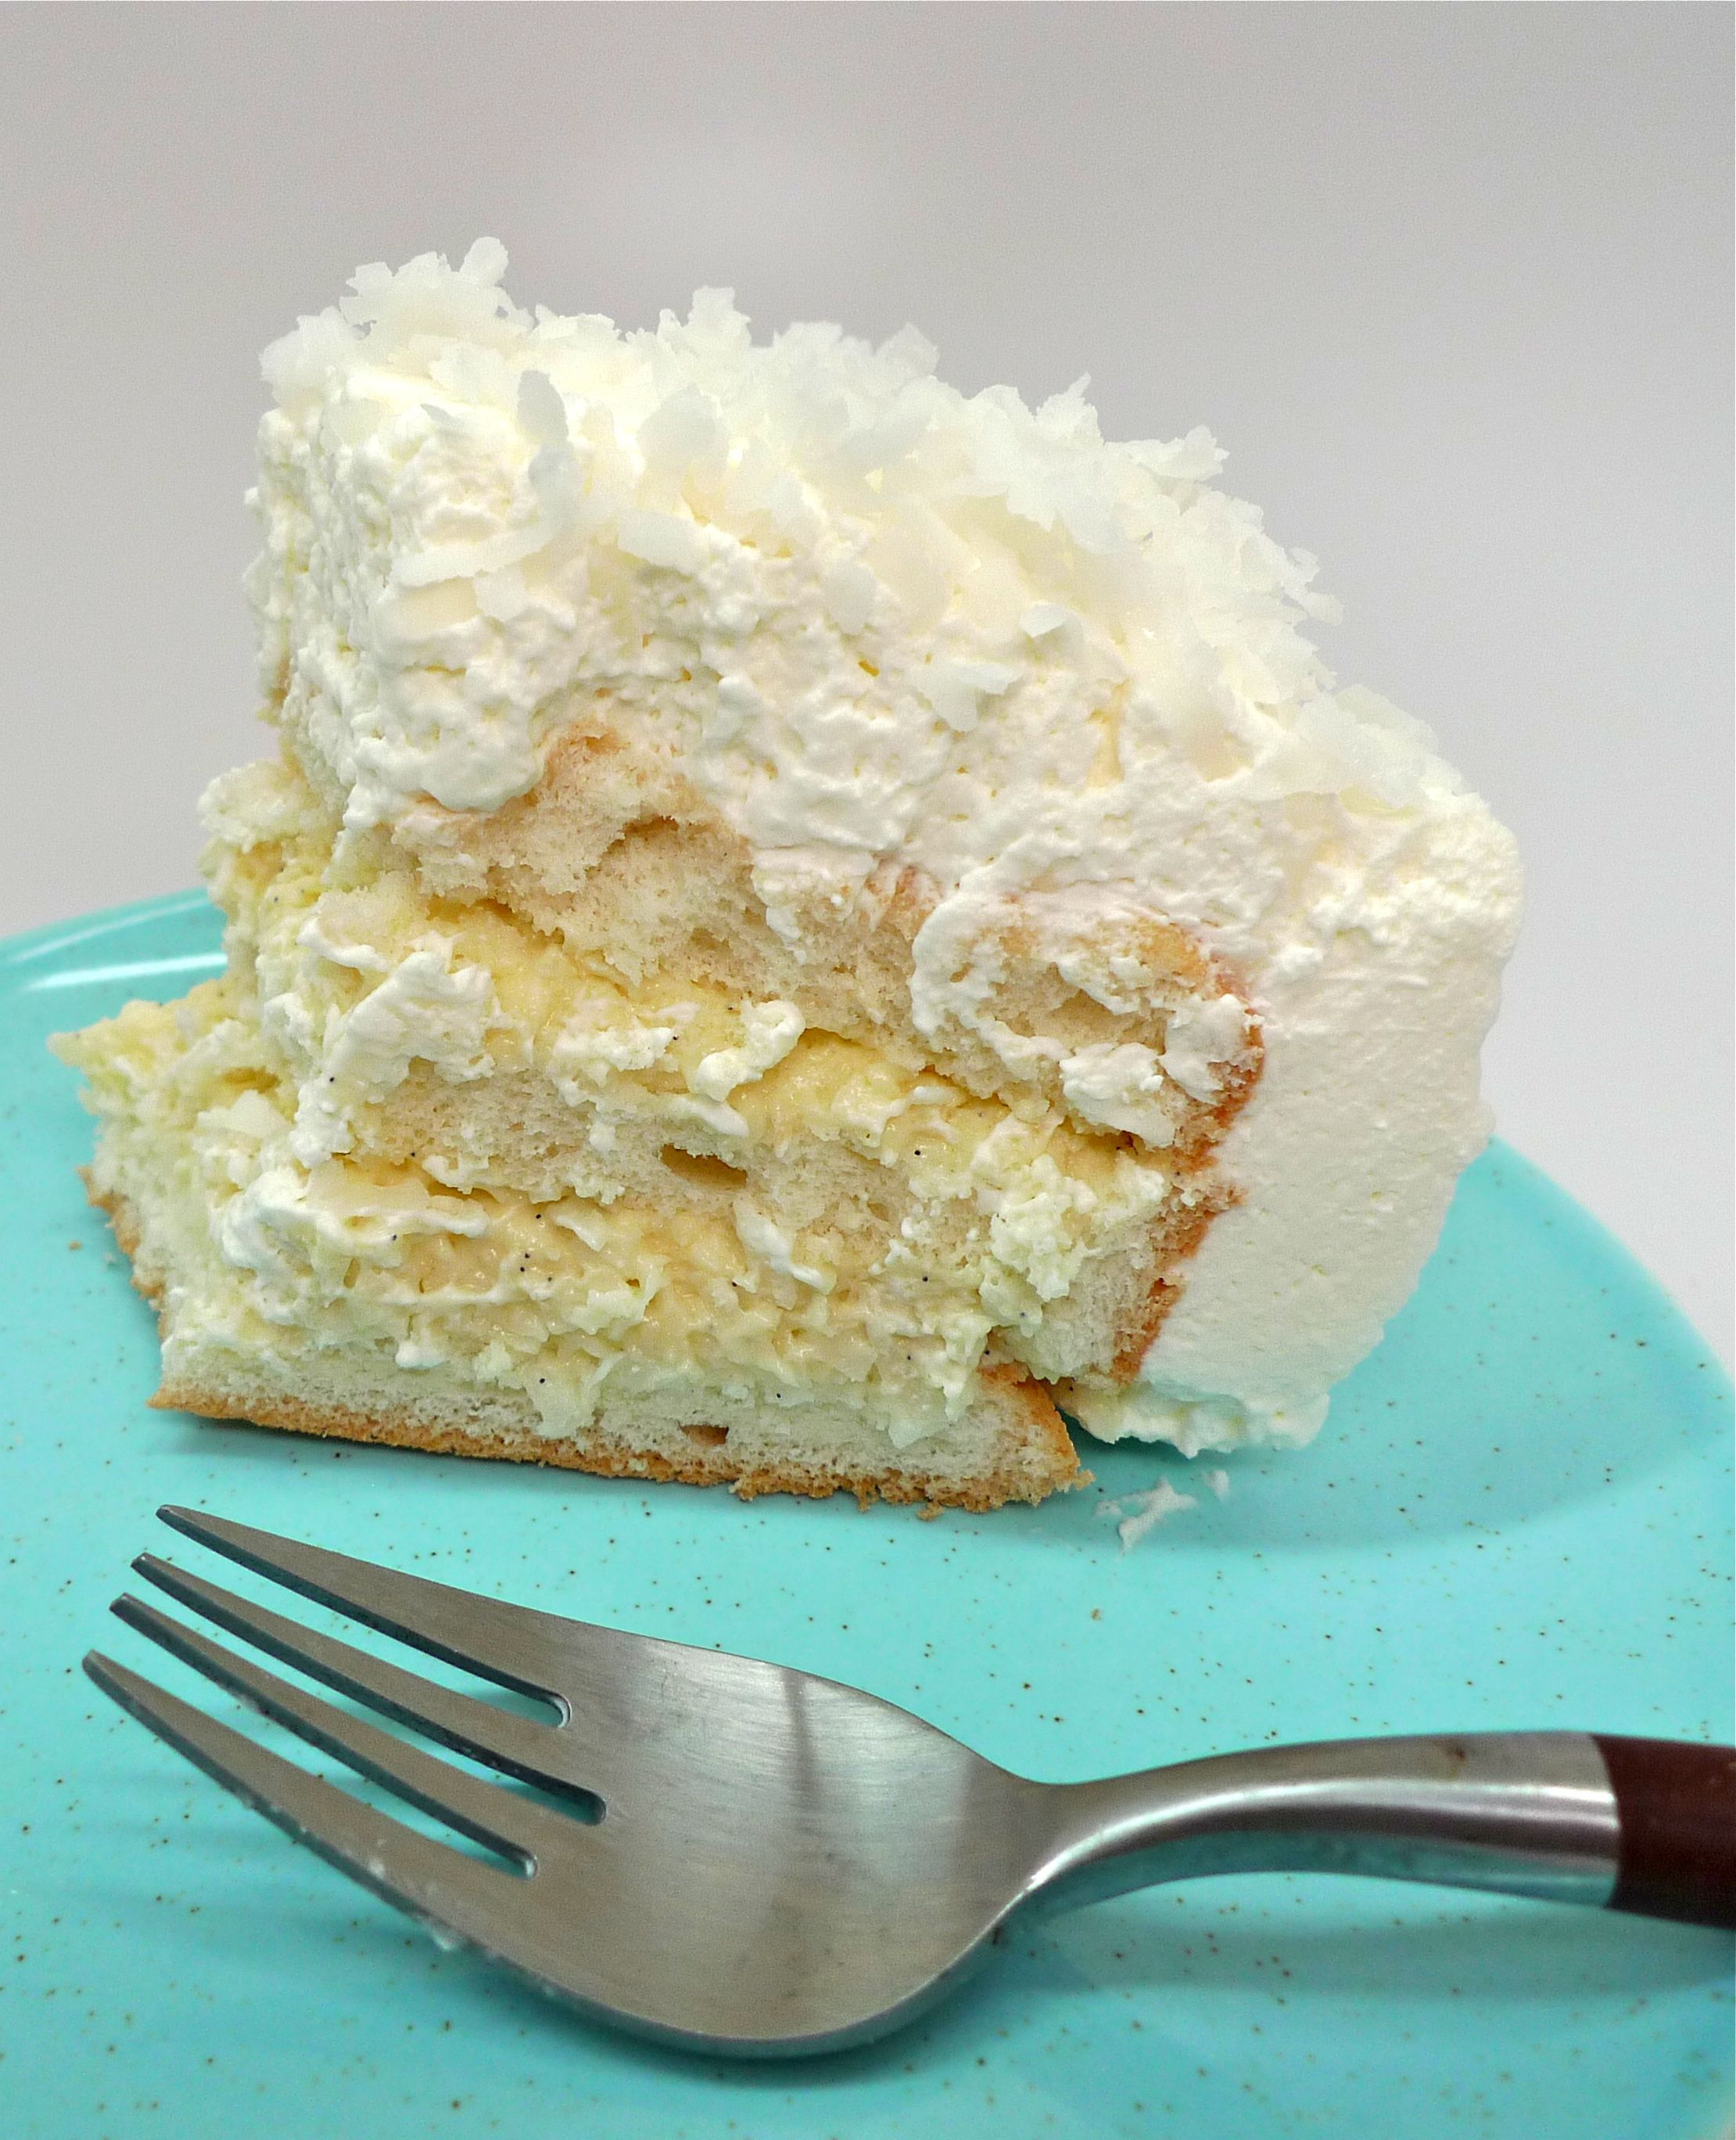
I had to have a bite while taking the picture; I couldn't resist.

The cake is so light, the pastry cream so yummy, all in combination with the whipped cream and coconut...

OH MY!

Yes, a little labor intensive but definitely worth it!

Here's the recipe:

**CAKE**

3/4 cup cake flour

1/3 cup sugar

1/4 teaspoon of salt

1 teaspoon baking powder

1 egg

1/3 cup water

2 tablespoons vegetable oil

4 egg whites

1/4 teaspoon cream of tartar

1/4 cup sugar

***PASTRY CREAM***

1  1/2 cup milk

1 split vanilla bean

1/3 cup sugar

3 tablespoons flour

4 egg yolks

***WHIPPED CREAM***

3 cups whipping cream

3 tablespoons sugar

sweetened coconut flakes

Preheat oven to 350 degrees

Sift together cake flour, 1/3 cup sugar, salt, and baking powder. Set aside. Combine egg, water and oil; add to sifted ingredients. Mix batter until smooth.

In a separate bowl, whip egg whites with cream of tartar. Gradually add 1/4 cup sugar; continue to whip to form a stiff meringue. Fold batter into meringue and mix thorooughly.

Pour into an ungreased 9-inch cake pan (I used a spring form pan) and bake about thirty minutes. Invert the cake onto a rack and cool.

To make the pastry cream: Scrape vanilla bean seeds into milk and bring to a boil over moderate heat (add vanilla bean pod to the milk as well). Combine sugar, flour, egg yolks; whip until light yellow.  Slowly pour 1/2 of the hot milk into the egg mixture to temper it.  Add milk-yolk mixture back to the remaining milk and cook over moderate heat, stirring constantly until thick.  Immediately remove bean pod and strain, then place in a bowl and cover with plastic wrap. Chill. (Having never made a custard before I was a bit confused by the straining. I would've loved to google it but stirring constantly and then trying to assure an almost two year old who awoke early from her very short nap that she could stop screaming and mama would be right there she just had to finish making the pastry cream...one more minute...hold on... simultaneously making a huge mess, not really straining anything in the end...you get the picture. I'll have to look into that. It still tasted delicious)

To prepare the whipped cream: whip cream and sugar until fluffy. Fold 1 cup into pastry cream; reserve the rest to frost the cake.

To assemble:

Cut your light spongie cake into three layers. Stir 3/4 cup of coconut flakes into pastry cream. Spread cream between layers of the cake. Frost top and sides of cake with remaining whipped cream and sprinkle with coconut flakes.

home made gnocchi

gnocchi.jpg

Some days are special. I knew when the mister was flipping through the Rao's cookbook yesterday it was indeed going to be one of those days. I don't know many husbands who say, "I think I'm going to make gnocchi today."  My excitement for the dish was far greater than my fear of what the kitchen would look like after he was finished. Gnocchi is one of my favorites. He went off to the market to gather his ingredients. He wasn't stopping at home made gnocchi, oh no, that was a mere appetizer to his orecchiette with broccoli rabe and sausage. Sunday supper with the mister. Sounds like a cooking show.

The recipe he used was for Gnocchi alla Romana. A semolina dumpling prepared Roman style. This required him to stir the semolina, milk, butter, salt and pepper constantly for about fifteen minutes or until the batter pulled away from the sides of the pan. There might have been some complaints about hand cramping, but I was busy with the little miss fingerpainting!

gnocchi2.jpg

The batter was transferred to a pan and spread out evenly with a spatula.

gnocchi3.jpg

Then it was time to let it cool. In between prepping his main dish, the mister took a few spins with the little miss to a few of her favorite songs while I washed some dishes.

gnocchi4.jpg

Using a one-inch round cookie cutter, he cut out his little dumplings and put them on a greased cookie sheet where they were baked for about fifteen minutes. Once cooked and golden brown, he transferred them over to a baking dish and topped them with fresh mozzarella, put them in the broiler to melt, and then poured on some red sauce all while clementine and I "practiced" finding easter eggs.

gnocchi5.jpg
AA.jpg

Yum.

gnocchi7.jpg

Our appetizer is served.

The gnocchi dumplings were so light and the flavor was amazing!

The rest of our dinner was equally delicious.

Besides being able to eat such a great meal, it was so fun to spend our Sunday afternoon together in the kitchen as a family.