a pink and orange easter

{with a side of bunnies, chicks, & candy dots}

This year we celebrated Easter all weekend. Saturday, the little miss had her friend over for some cottontailed bunny cupcakes and confetti egg fun, and on Sunday we had our traditional dinner.

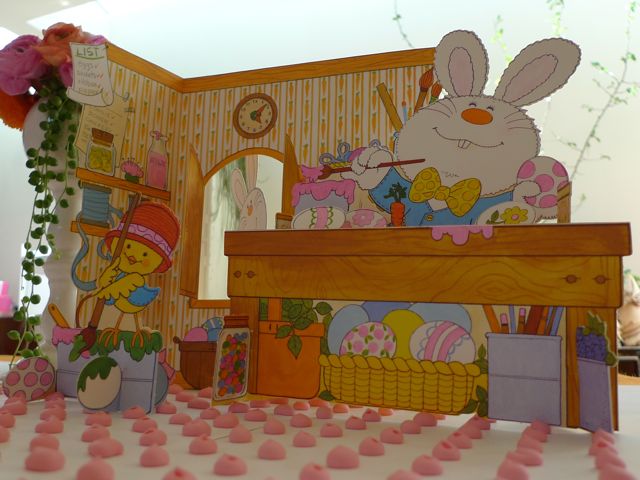
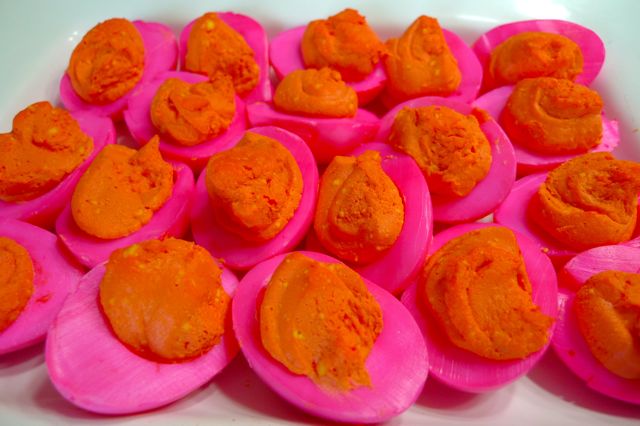
My theme did start out as pink but eventually I added orange, one of my favorite color combos! I wanted it to be pretty and bright, but also whimsical.

I decided to make homemade candy button placemats that doubled as a table runner when put all together. Yes, that's a lot of dots! 1309 to be exact. It was actually much simpler than it seems. After dinner, you could just pick at your placemat for dessert!

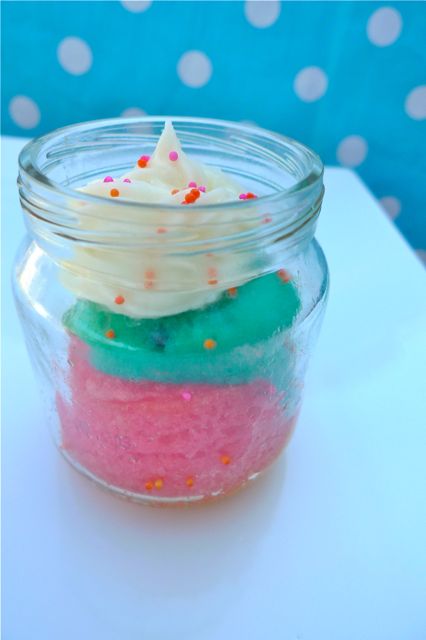
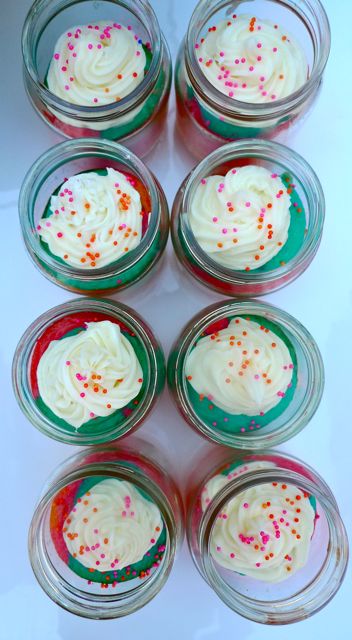
I finally found an excuse to get a small cotton candy machine for home; I had to complete my vision of a cotton candy "cottontail" on a white bunny cupcake, I mean, c'mon, let nothing come between me and my easter vision!

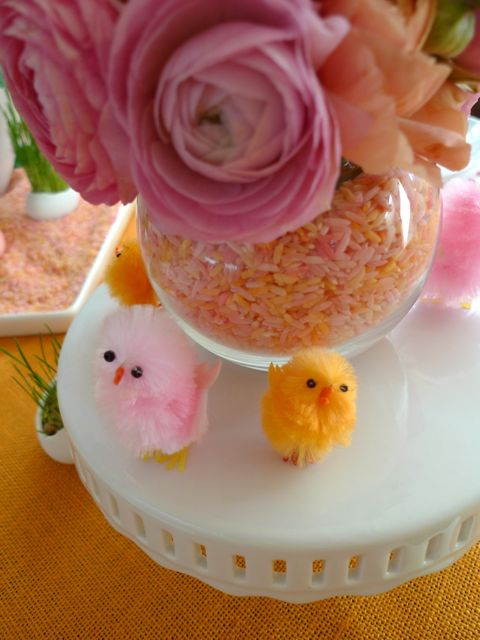
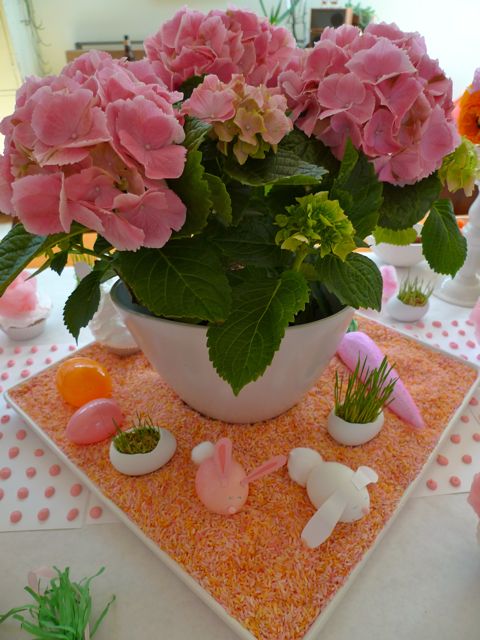
Throw in some fuzzy chicks, more colored rice, lovely orange burlap, bunnies made out of blown eggs, sparkly pink carrots hung from the light shade, strings of tissue paper tulips hung from the ceiling, some vintage easter nostalgia, wheatgrass planted in little porcelain eggs, pretty blossoms, and presto! our easter table(s) came together!

gold at the bottom of the rainbow {cake} and the rest of our st. paddy's day

cake.jpg

The little miss may not have caught a leprechaun, but it was fun to try! We know there was one in the house though; she had a green lip print on her forehead when she woke up and all throughout the day things kept turning green! As for the rest of our St. Patrick's Day, there were rainbows in all forms, lots of green, and of course, gold!

I have been wanting to make this rainbow cake forever! I didn't follow the recipe exactly, I put whipped cream in between my layers and used a homemade vanilla frosting instead of a lemon buttercream. The cake is super moist and delicious. Although I had to get the idea out of my head that I wasn't eating play-dough every time I took a bite! Chocolate gold coins graced the bottom of the cake...gold at the bottom of the rainbow!

stp11.jpg

A crepe paper rainbow and a pot of gold were found in the bathroom.

stp2.jpg
stp3.jpg

Caramel chocolate pretzel sticks, stickers, green nail polish, shamrocks, and glittery green hats.

stp8.jpg
stp6.jpg
stp9.jpg

let the holiday craft party begin!

Whoo Hoo! Put on your tutu and lets have some fun!

The girls got together for their holiday crafting and merriment extravaganza.

On the agenda: donut hole snowmen, rudolph, snowglobes, and silliness.

It was quite a success.

Present wrapping, the busy post office, and cookie baking are calling me right now, but I will post details of each project later on tonight! What fun

party1.jpg
party7.jpg
party2.jpg
party5.jpg
party3.jpg
party6.jpg

a bright baby shower

It's sometimes challenging to take good pictures of things as you're rushing around pulling a party together. Here are a few shots from late night cake pop preparation and alphabet cookies to the crazy hot pink and orange deviled eggs my mom made; the result of cake pop delirium and too much wine! They were something! It was a beautiful sunny day and we were able to have the party outside on my mother's deck overlooking the Hudson River and Catskill Mountains. Lanterns, sparkly letters strung and hung, a 'Baby Mama' banner which I found and fell in love with while searching on etsy, balloons, bright tissue paper flower garland, hot pink roses in blue vintage mason jars and orange marigolds from the garden, bright fabric, and modern fun blocks were among the decorations. The cake pops were inserted into styrofoam blocks that I wrapped in bright crepe paper and set upon the dessert table with the alphabet cookies and baby food jar cakes. The sunshine made the bright colors all the brighter!

shower1.jpg
s22.jpg
s27.jpg
yes.jpg
s26.jpg
s24.jpg
s25.jpg

make something: A-Z necessities for the new parent. Words of wisdom and keepsake book for the baby shower.

*

*

We had an alphabet theme for my sister's baby shower (in case you haven't caught on to that by now!).  One day, while at Michael's, I came across a made-for-teachers bulletin board alphabet with green polka dotted trim. It was super cute and I liked the idea of bringing it back to elementary school and learning to write. Especially since my sister is a teacher. I wasn't sure exactly what I was going to do with it when I purchased it but then it came to me.

I was going to make a book!

A book where guests can share their wisdom with the new parents in an A-Z format.

It is not only a great activity for the guests but a keepsake for the new mama.

Here's what I did:

Cut out each letter and pasted it onto a piece of lined writing paper, color photocopied each page to make it seem more finished otherwise the heavy cardstock of the letters was to weighty for the lined writing paper, made a front and back cover which I laminated, and then had the whole thing spiral bound. Pretty simple.

On the back page we all wrote in our name and our guess for the baby's birth date and weight.

I think it was a pretty good idea!

A lot of times a shower invitation will contain a card that asks you to write something and bring it with you to the shower. I always forgot mine. Doing it right at the party seemed like a better idea. It's simple one word or short sentence format makes it an easy thing to do even as the presents are being opened.

Two other variations of this would be:

A photo book for a more finished version. Take pictures of all 26 letters, maybe from signs that you see around town or even from books or stencils. Make a photo book online putting only the letter photograph on each page and leaving the rest of the page blank for writing. You could mix in prego pictures of the new mama or the happy couple. Or even photos of the couple from when they were a baby!

Or for a more home made scrapbook feel, just paste letters to a pre-bound white page sketch book or small scrap book, heck, even blank pages in a three ring binder would do the job!

Pass it around and see just how clever your guests are!

colored cupcakes baked in baby food jars!

a.jpg

A while back I saw rainbow cake baked in a mason jar and fell in love.

At that moment I knew for my sister's baby shower I would attempt to bake cake in baby food jars. How appropriate!

Bright Pink, orange, and blue are her colors and with the help of the new neon food coloring on the market (gasp! sorry all-natural food coloring, you just didn't work for this party!) I was able to achieve just that. It was actually quite easy. Spray the jars with a non-stick baking spray and fill with batter. I layered my colors but didn't pay too much attention to being perfect. I wasn't looking for stripes just colorful fun cake. It's important to fill the jars just shy of the halfway mark to ensure that it doesn't rise up and leak over the sides while baking. That wouldn't be so pretty. I used 4oz jars which is the perfect snack size equivalent to a cupcake. After filling the jars, place on a cookie sheet, or in a cupcake pan, and bake. After they have cooled completely top with a dollop of frosting.

shower5.jpg
shower6.jpg

I like that the whole sweet treat is contained in the jar. You could even put the lid on, cover it with a coordinating piece of fabric, tie a ribbon around it and use it as a cute baby shower favor!

Ours were placed on the dessert table next to a pile of bright orange spoons (you need a spoon to eat the cake out of the jar) to enjoy while watching the big present-opening-event.

jar3.jpg
jar4.jpeg

from baby shower invitation to quilt: alphabet and critters sitting in a tree!

quilt1.jpg

My very talented mom has made it her "thing" to transform our baby shower invitation into a quilt for the new little one. She did it for me back in 2009 with an owl quilt that is fantastic and bright and really outdid herself this time around, too! Look at this quilt she made for my sister. We hung it up at the shower as part of our decor. Amazing!

She changed the cat to look like my sister's cat. Very clever, mom!