shamrock bites

cookies5.jpg

Here it is, my St. Paddy's Day version of the Love Bites I made for Valentine's Day. Substitute green for pink and switch the cookie cutter!

Here's the recipe again:

2 sticks butter, softened

3/4 cup powdered sugar

1/8 teaspoon salt

2 1/2 cups all-purpose flour

1/4 green nonpareils

With mixer on medium speed, beat together butter, sugar, and salt until light and fluffy, about 3 minutes. With mixer on low speed, gradually beat in flour until combined. Mix in nonpareils. Roll dough to 1/2 inch thickness between two sheets of wax paper, transfer to baking sheet, and refrigerate for 3 hours or up to 3 days. (LOVE make ahead stuff! Especially when I made the dough I realized I didn't have a shamrock cookie cutter!)

Heat oven to 350. Cut out shapes from dough. Place on baking sheet 1/2 inch apart and bake for about 14-18 minutes, until just golden. Transfer cookies to rack, and cool completely.

You can brush the edges with light corn syrup and dip into crystalized sugar for a finishing touch.

cookie1.jpg
cookie.jpg
cookie4.jpg

love bites.

vday-lovebite31.jpg

Ridiculously easy and SO yummy! The best part? There's nonpareils in the dough! 

(from Parents magazine)

2 sticks butter, softened

3/4 cup powdered sugar

1/8 teaspoon salt

2 1/2 cups all-purpose flour

1/4 cup pink/red nonpareils

With mixer on medium speed, beat together butter, sugar, and salt until light and fluffy, about 3 minutes. With mixer on low speed, gradually beat in flour until combined. Mix in nonpareils. Roll dough to 1/2 inch thickness between two sheets of wax paper, transfer to baking sheet, and refrigerate for 3 hours or up to 3 days. (LOVE make ahead stuff!)

Heat oven to 350. Cut out bite-size heart shapes from dough. Place on baking sheet 1/2 inch apart and bake for about 14-18 minutes, until just golden. Transfer cookies to rack, and cool completely.

You can brush the edges with light corn syrup and dip into crystalized sugar for a finishing touch.

I dipped some of my cookies in chocolate which turned out to be a delicious combination.

They are also just plain yummy on their own. Not to mention cute and mini!

vday-love-bite-sprinkle.jpg
vday-lovebite2.jpg
vday-lovebite11.jpg

This recipe could easily be varied for other occasions...green nonpareils and a mini shamrock shape for St. Patrick's Day. Or even just rainbow nonpareils in a simple circle or star would be cute. I'll keep this cookie recipe close by!

hearts and crafts: the very pink valentine celebration

vday-table-left2.jpg
vday-heart-cookies.jpg
vday-tableright.jpg
vday-necklace-supply.jpg
vday-lovebite3.jpg
vday-dress.jpg
vday-table-left-with-eggs.jpg
vday-puttingvalentinesin-frog.jpg
vday-hopping-like-frog.jpg
vday-pond.jpg
vdaycccc.jpg
vday-readingvalentines.jpg
vday-weez.jpg
vday-monket.jpg
vday-adshomemadev.jpg
vday-makingnecklce.jpg
vday.jpg
vday-.jpg

The little miss had her best friend, Addie, over for a pink valentine celebration. Pink cupcakes, candy, hearts, cookies, valentines, balloons, tissue paper flowers, even hard boiled eggs! There's a small part of me that hopes if I just bombard her with pink she will decide to rebel and like another color; until then, I put on my very pink, vintage, bedazzled dress and a big smile.

The valentines were placed in the froggy 'mailbox' that I had made out of a box, some green wrapping paper, and some extra large google eyes. Before the girls could open them, they had to hop like frogs on the hearts, jump or swim across the pond of bubble wrap (who can't resist popping those bubbles?!) and slither like a caterpillar or snake under the streamers. It was lots of fun. They did it quite a few times before opening their home made valentines and then about thirty more times after! They managed to squeeze in a few bites of their heart shaped pb&j's, munch on a few cookies, and lick the pink frosting off of a cupcake or two.

Then it was craft time. Pink pasta necklaces with a paper "locket" that I had written 'best friends' on. This was a big hit! After stringing the pasta, the girls pasted their pictures inside the heart. They loved it! Look how happy they are as they checked out their necklaces in the mirror. I love that pure joy!

Even weezie, our brussels griffon, had fun at the pink party. Although, I'm sure she's quite happy to have the bubble wrap pond off the floor today. Me too!

Details on the pasta necklaces and 'love bite' cookies to follow...

this valentine is for the birds!

bff.jpg

We really did enjoy watching the birds eat everything off of our ballerina birdfeeder. I wanted to incorporate that idea into a type of valentine. This is what I came up with!

We live far away from all of Clementine's grandparents and I thought this would be a fun surprise for them. (If you're reading this now, surprise, this will be arriving in your mailbox soon!) I thought we could go with the ol' " a little birdie told me..." phrase, which led me to this:

back.jpg

They are very easy to assemble, and even though it looks like a lot of steps, they go together super quick.

Here's what we used:

Red heart doilies (we used 6 inch)

cardboard (think shipping box, shoe box, cereal box, etc. really, just grab something from your recycling)

brown paper grocery bag (or any sort of kraft paper or construction paper will do)

glue stick (preferably a stronger bonding type)

twine

bird seed (we used straight oiled sunflower seeds. I liked how it looked all black, but any seed variety will work)

peanut butter and/or vegetable shortening (you can use either on its own or combine)

brown waxed sandwich bags or natural parchment

scissors and a hole punch

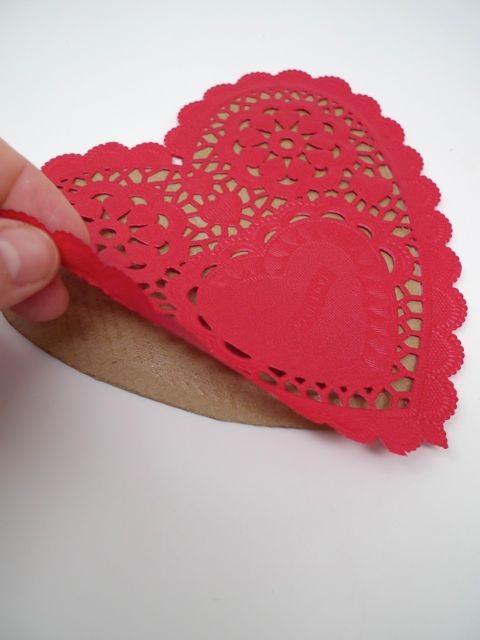
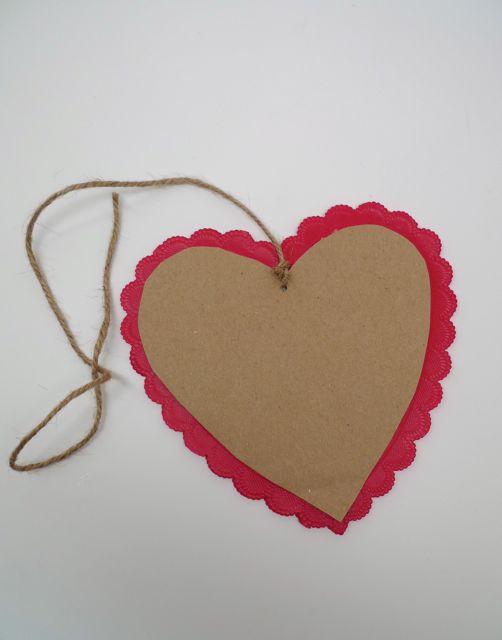
Start with one doily.

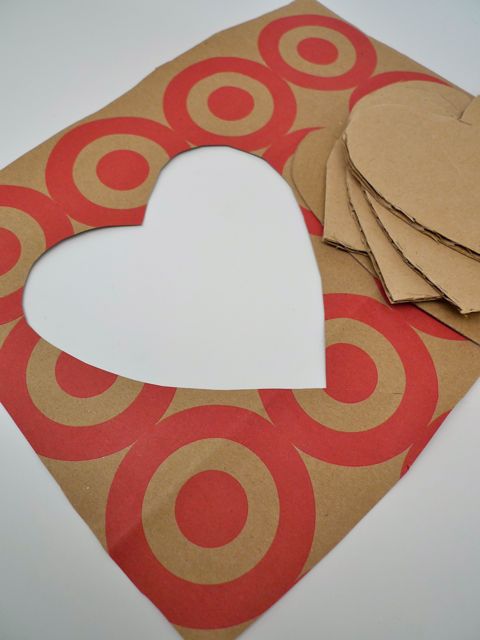
Using a pencil trace the heart shape onto a piece of cardboard.

Cut out the heart shape.  If you are making more than one bird feeder valentine, use this heart to trace others. Once those are done, set aside and get your brown bag or paper.

Trace your cardboard heart on the bag and cut out. Now it's time to assemble.

Cover the cardboard heart with glue. Place the doily on top.

Press down to secure.  Flip over.  The glue stick will remain a little tacky, so it would be best to work on a sheet of wax paper or parchment. Or you could let it dry completely before moving on. Repeat for the other side.

Glue the paper heart on top of the doily. If you used a box that has print on one side, choose that side to cover. This step is totally optional. I really just added it because even though the glue stick is non-toxic, I wasn't sure if the birds should be pecking at it and eating it.

Punch out a hole in the center top of heart.

Tie a piece of twine through the hole and knot it.

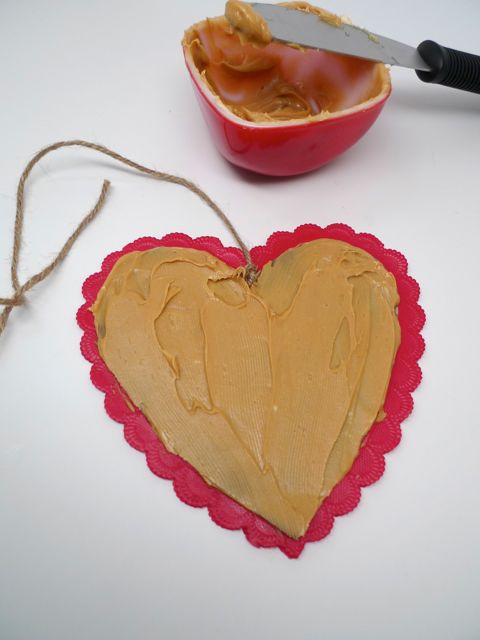
Spread the peanut butter or shortening over the paper heart as neatly as possible avoiding the doily.

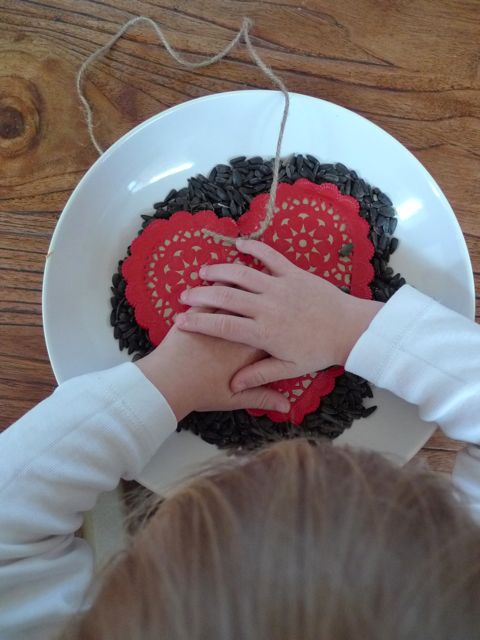
Put the bird seed into a shallow bowl or pan.

This is where the little miss liked to help out. Press the peanut butter side down into the seeds. Turn over and use your hands to cover any spots that need it. Really press the seeds into the peanut butter.

Give it a shake so that the extra seeds that didn't attach fall off. Done! When it is hung from a tree it will be birdseed on one side and a red heart on the other.

Place in the freezer to set while you clean up and get the packaging together. This is not a necessary step, of course, you could skip ahead to packaging. Since we have to mail these I thought it would make packaging them up a bit of a neater process.

Place bird feeder valentine in a brown, waxed paper sandwich bag.  I, unfortunately, was all out and wanted to make use of what I had on hand, so I made envelopes out of natural parchment. Wrapping them up like present in waxed or parchment paper will work as well.

Maybe you can think up your own fun saying, we used "Let the little birdies come tell you how much I love you!"  That seemed appropriate for a toddler to say to her grandmas, but after I had some time to think about it (that would be post-Clementine bed time) I came up with this:

"The birdies will come from miles away to tell you you're loved and missed this Valentine's Day!"  I always like a rhyme.

OR, say you were making these to give to a child you could say:

Hang me up and you will see the little birdies come to me.

Listen as they say, "Tweet, Tweet. Be my valentine, you're so sweet!"

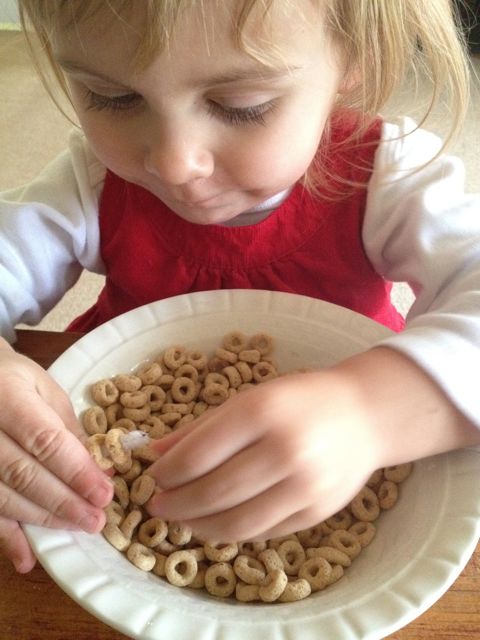
I know Clementine LOVED watching the birds! (I'm not saying she wouldn't prefer something of the sweeter, say edible, variety but she would definitely enjoy this in addition.)

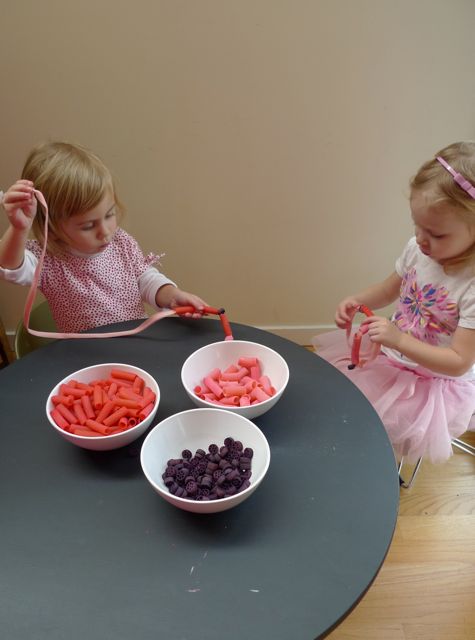
There are so many ways to package it up. You could just use twine and go with a simple natural look, or think like a two year old who said, "pink, mama, pink!"

Anyway you wrap it up, it's still a different approach on a classic doily valentine and the birds will love you for it too!

tissue paper heart garland

heart7.jpg

It was time to take down the snowflakes and start thinking about valentine decorations. Last year's were all tangled in a box. I needed something new.

I recalled heart garland that I had seen on etsy made of felt. I like that idea, but it seemed a little heavy. Tissue paper was my answer.

Seriously, this is such an EASY project! If you can sew a straight stich on your machine you're good to go. It took me longer to hang these up than it did to make them!

Here's what I did:

heart1.jpg

I picked up some sparkly pink tissue paper from the dollar store, made a heart shape out of sturdy paper, stacked up my tissue paper, traced my heart and cut.

heart2.jpg

I stitched the tissue paper hearts together at the widest part for the most support, and left a little space in between in each heart.

heart3.jpg

The tissue paper is much stronger than you think. I love how light and delicate it looks when hung. It glows in the sunlight and if you can find the sparkle paper it has a great subtle glimmer!

heart4.jpg

home made {ballerina} bird feeder

bf13.jpg

We spent our holidays visiting family on the east coast; there were festivities, friends, merriment, and germs. The little miss picked up a virus which made for a very sad new year's celebration. It's amazing to think that something so cute can be so germy and contagious. The cold has spread to everyone and we are a bit house bound at the moment. I'm going a little stir crazy.

It's been difficult mustering up the energy to play house with Clementine, which is what she always wants to do. "Be the mama!" she insists. "Okay," I respond picking up the mama doll, "Mama is very tired and she's going to lie down in bed."

"No! Be the mama!" she demands again.

I needed to find an alternative that didn't involve lying on the floor which made me want to sleep.

What to do, what to do?

A bird feeder!

The old fashioned kind with a pine cone and peanut butter (ah, enter a nostalgic sigh!) would be a fun activity and then we could watch for birds after; bird watching is one of my favorite things to do upstate.

I googled and found all sorts of home made bird feeder ideas. Stringing cheerios on a pipe cleaner was the easiest option, but then I found the recycled toilet paper roll. Hmmm, maybe we could combine all three.

So we did.

It didn't start out with the intention of being a ballerina. I had grabbed a roll of pink crepe paper and once we strung our cheerios on the pipe cleaner, an activity that was VERY fun for the little miss and she thought it was really cool that birds would enjoy eating the same cereal as she did, and kind of assembled all of the things together I realized that it looked a lot like a ballerina; a very tall, long waisted, dangly, skinny legged ballerina. Blame it on the cold medicine, but it's pretty darn funny.

The heart was a last minute addition, maybe it would make a good home made valentine gift!

Click on the pictures below to see the step by step. It's really simple. You could adjust it to fit the needs of whatever supplies you happen to have on hand. If you have peanut allergies you can use crisco or some other vegetable shortening. I used both just to see, and they both worked great.

We used:

empty toilet paper roll

pine cone that we found in the yard

4 pipe cleaners

hole puncher

crepe paper

scissors

hot glue (for the crepe paper skirt and to hold the pine cone in place inside the tube)

peanut butter/ crisco

bird seed

construction paper heart

The birds seem to like it and Clementine squealed with delight to see them eating the seeds off our creation!

making a snow globe with a toddler

snowglobe11.jpeg

The little miss has been fascinated with snow globes this holiday season. I thought it would be a great thing to make at the craft party. (Yes, it was just the two girls, but I still like to refer to it as a party.) There are many how-to's out there and they all seemed to vary from using aquarium glue to screw on the lid and go. As much as I love the sparkling falling snow floating slowly upon the trees there was one thing that was holding me back: water! These are two year olds, any element that could lead to disaster that I can omit, well, I'm all for it. That's why I was delighted to come across tidy mom blog and her instruction on waterLESS snow globes. How perfect! Here's what we did:

We started with a large baby food jar. Cut out a circle of felt and hot glued it to the lid.

Next, we had the girls choose a character from the selection of little christmas ornaments I found at Michael's. Clementine chose the snowman named Frosty, to her EVERY snowman is Frosty, and Addie chose Santa. Each picked out a tree that I found already sparkly and decorated with beads. While they played with the extra ornaments, making them dance and "ice skate" on the table, I attended to the hot glue gun.

First the tree was glued down. I took a sparkly pipe cleaner and rolled it into a little ball and glued it to the lid next to the tree. This would help to prop up the characters so they didn't sit so low, I glued the snowman right to the pipe cleaner and a little glue on its back to hold it to the tree.

We had the girls pick out some other things to include in their snowglobe like a pom pom for a big snowball and a sparkly snowflake. These were both glued in place. Now the fun part:

I really did let two two year olds pick up a hand full of fake snow and then shake their own glitter into the jar. I was nervous, I can't lie. At one point the lid on the glitter opened more than I wanted it to and glitter went EVERYWHERE! Thank goodness I covered our work space with paper to help with the clean up. I'm sure our house will be sparkling in places well into summertime. It was worth it!

We put our lid on and turned the jars over. Almost done!

I glued a soft sparkly trim to cover the lid and deter tiny hands from unscrewing. Shake it up and watch it snow!

Clementine has showed everyone who's come over to visit. The perfect snow globe for toddlers!